Product
The Curvegrid Test Network is Live

Photo by Battlecreek Coffee Roasters on Unsplash
MultiBaas equips you with the tools you need to build and run high performance DApps. To further empower blockchain developers, we have released the Curvegrid Test Network! This private Proof-of-Authority (PoA) Ethereum network has the following features:
Fast transaction confirmation times, typically less than a second
Shared amongst all MultiBaas Curvegrid Test Network deployments, for collaborative DApp development
Built-in faucet for your convenience: request ETH to be sent to your address through the MultiBaas UI or via a REST API call
Curvegrid Test Network Configuration
Sign up here and deploy a new instance with Curvegrid selected as your network of choice
Install the MetaMask web3 extension in Chrome or FireFox, use the Brave browser, or another suitable web3 browser
Once you log in to your MultiBaas deployment, you will see Network Mismatch as is illustrated below.

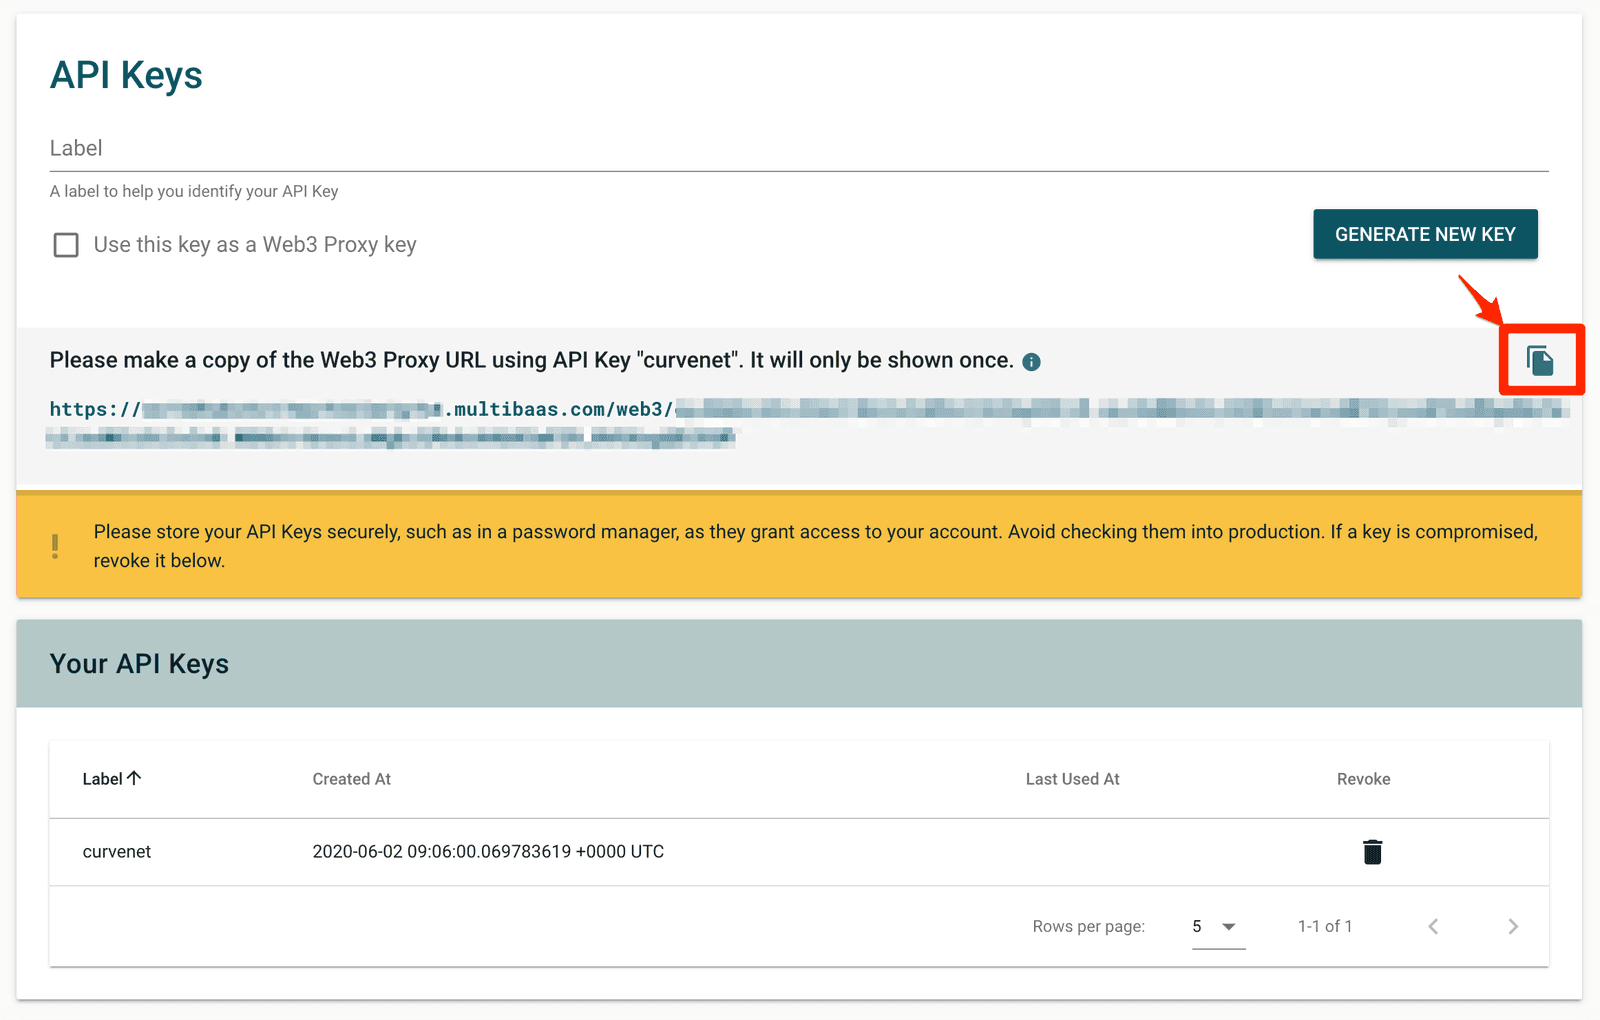
OK, let's start! First, you need an API key to access the Curvegrid Test Network. Click Account in the navigation bar, then API Keys.

Be sure to check Use this key as a Web3 Proxy key, enter a label, and click Generate New Key.

Now you can copy the Web 3 Proxy URL and add a new network in MetaMask or your web3 browser.
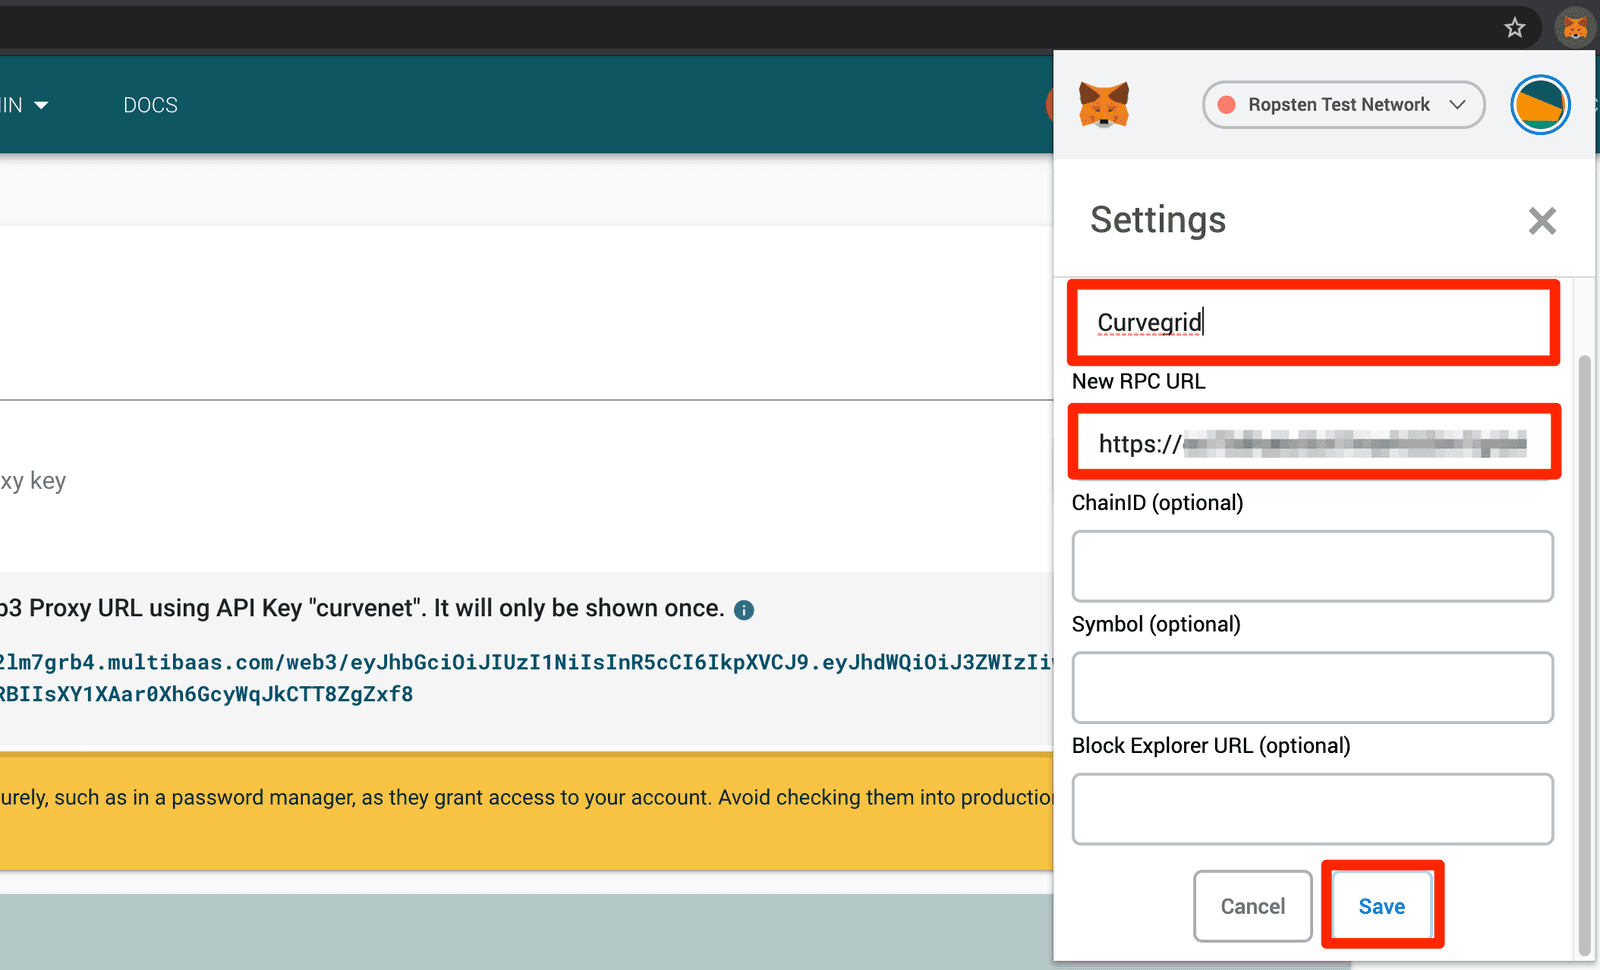
Add a new network.

Enter a network name (for example, Curvegrid) and paste the generated Web 3 Proxy URL.
Congratulations! You are now ready to use the Curvegrid Test Network!

Faucet
In order to perform actions (sign and submit transactions) on the Curvegrid Test Network, you will need to acquire some test Ether (ETH) from our faucet to pay for gas. The faucet is a smart contract deployed on the Curvegrid Test Network and it is integrated into the MultiBaas UI.

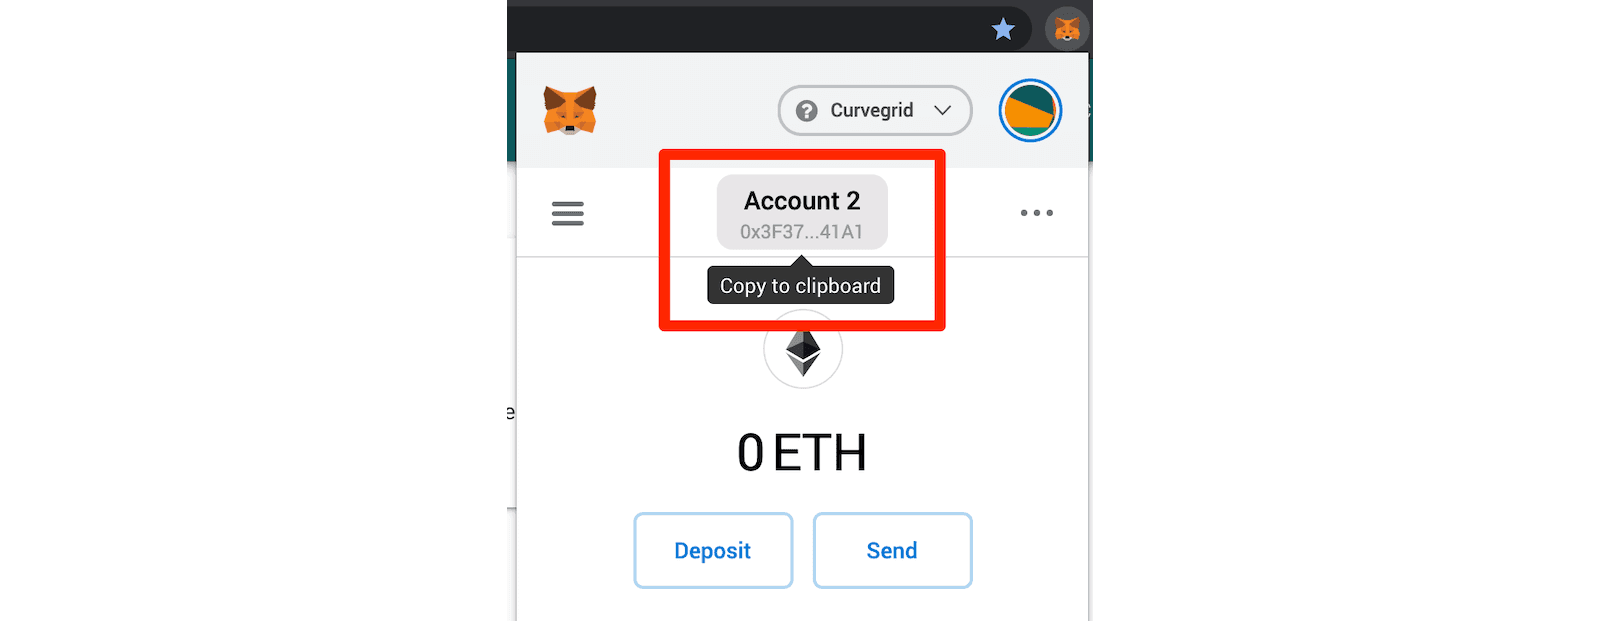
Now, let's request some ETH to be sent to an address. First, ensure you have your Ethereum wallet account address in the clipboard. With MetaMask, click the extension icon in your browser, select the round account icon in the upper right, and click the account to copy to the clipboard.
Click Account in the navigation bar of MultiBaas, then Faucet.

Paste your Ethereum wallet account address into the Ethereum Address field, then click Request 1 ETH from the faucet.
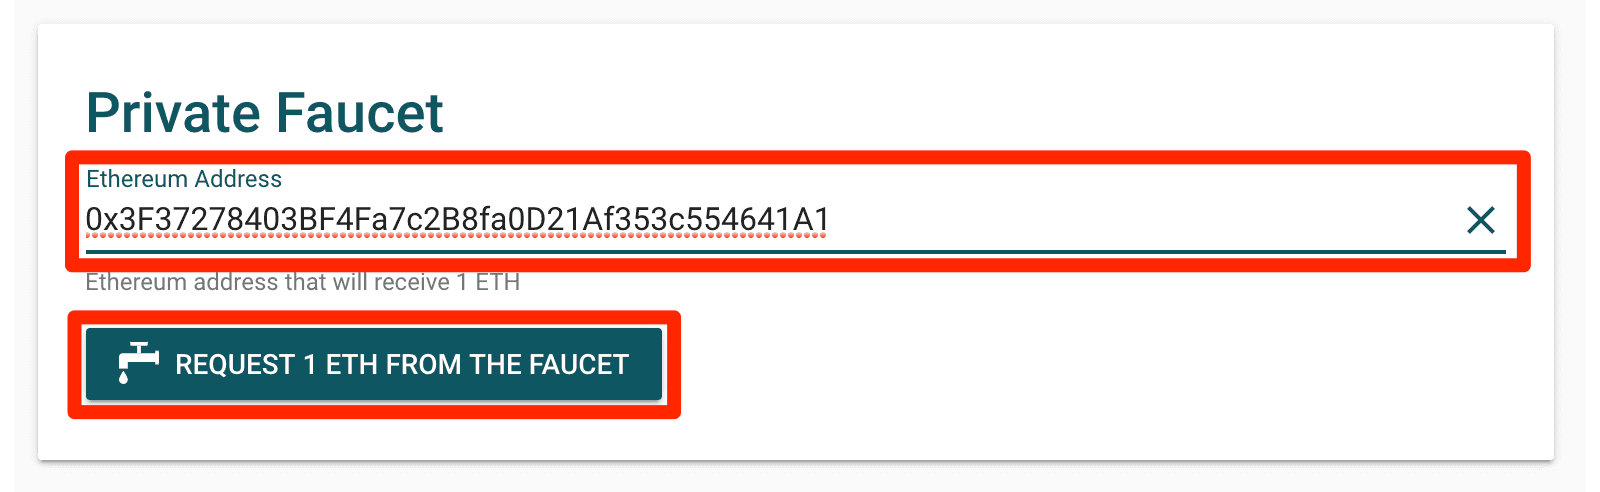
Within a few seconds, you should see a green confirmation bar.

Now the account has 1 ETH.

You can also request 1 ETH when you add a new address in your account details. This is accessible via Account then My Account in the navigation bar. Entering a new Ethereum account wallet label, address, and checking the Request 1 ETH from the faucet check box will also request 1 ETH from the faucet.

Within a few seconds, you should see a green confirmation bar.

Faucet Limits
The faucet has some limits built in. It will refuse to dispense Ether to an account if it already has 1 ETH or more, or if a subsequent request is made within six hours. These conditions are subject to change as the network's requirements evolve. If you see an error message when requesting Ether from the faucet, it is likely that you are asking too often, or you already have some.
Happy BUIDLing! Please feel free to contact us for more information or click the chat button in the bottom right.