Learning
Day 5: Testing a DApp from First Principles

Ethereum Node + Web Server + Decentralized App (DApp) Browser
This post is intended to provide an end-to-end walk through getting a DApp up and running on a basic toolchain. We work directly with the Ethereum node, web server and DApp browser rather than using wrapper scripts to help show what is going on behind the scenes.
We build on the existing Solidity Remix IDE 'Donation' tutorial, with updates for the current state of the tools (June 2017).
The essential infrastructure is an Ethereum node (we picked geth), a standard web server to host static files (we used python -m SimpleHTTPServer) and a DApp browser (we chose Mist).
The architecture of this kind of DApp is that the DApp browser (Mist) loads the static HTML, JS and CSS files from the web server and provides, in addition to the standard DOM, access to the Ethereum node (geth) via the injected web3.js object. Essentially the web page can interact with the Ethereum blockchain as well as the normal web.
Start Geth in Dev Mode, Create an Account, Mine Some Blocks
For a DApp this simple, we can just run geth --dev which sets up a single node Ethereum test network for us along with a number of helpful options.
Once geth is running, create a test account.
Then start the miner to mine some blocks. The coinbase will have automatically been set to the test account so the mined Ether will be deposited there. You can verify this by running eth.coinbase.
And after a few seconds, stop the miner.
Now check the balance in your test account.
Our test account has 40 Ether in it, which at 5 Ether per block means it mined 8 blocks in 8 seconds on a contemporary iMac, including generating the DAG.
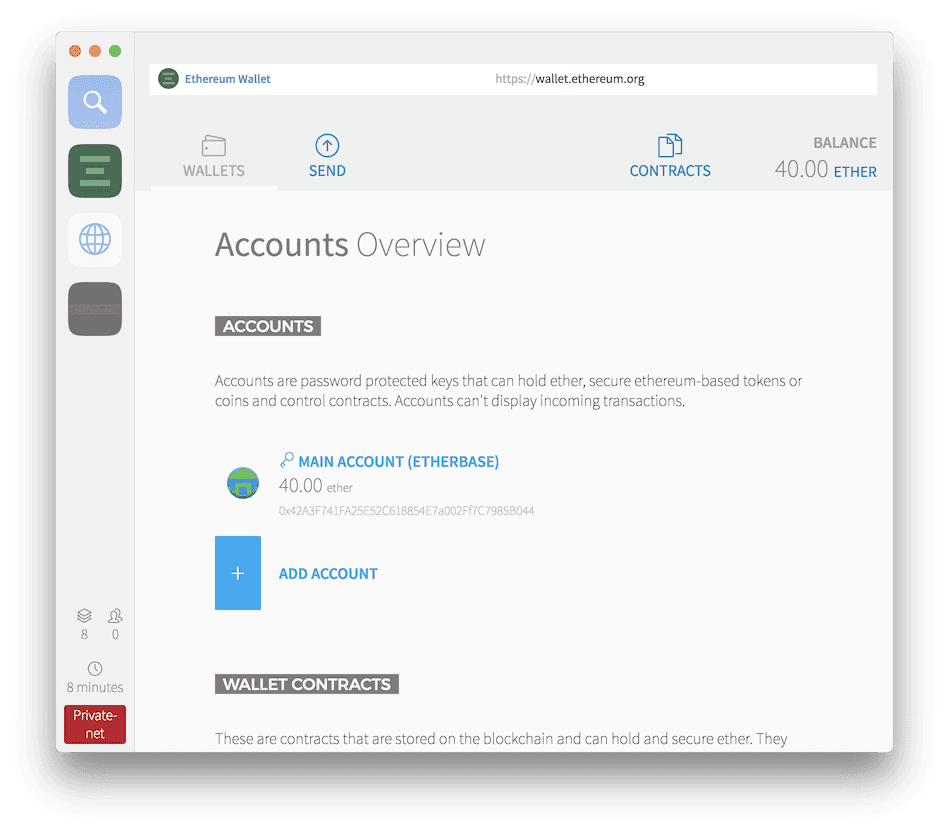
Note that you can also launch the Mist browser against the geth dev instance, by specifying the IPC endpoint (note the Mist command line option is --rpc even though it is IPC). You might need to click "Launch Application" in the Mist splash screen if it stalls on "Looking for peers".
Linux:
Mac:
You can see the balance of 40 Ether in our test wallet. Mist also displays a bright red indicator at the lower left, "Private-net" to indicate this is not the public Ethereum network.
Test Network Alternatives
Instead of geth dev mode, we could have chosen to run on a private test network. We tried that during the [Consensus 2017 Hackathon]({{ site.baseurl }}{% link _posts/2017-05-12-daysofblock-03-consensus-hackathon.md %}), but ran into a number of issues.
We could run on one of the public test networks, but that would mean exposing our smart contract to that network in addition to incurring all of the performance and capacity implications associated with public test networks.
Alternatively we could run on the main network, but that would be expensive (June 2017: Ethereum transactions cost about US$0.30 each).
Geth Dev Mode Explained
We were surprised at how fast this was. When setting up geth to run on a private test network, there is the whole process of creating a genesis block and running geth with the correct options. If you start geth with a low difficulty so that it mines quickly, the algorithm with quickly adjust and soon blocks will start taking tens of seconds to mine and then minutes.
There are ways around this with geth, including switching to Proof of Authority for the consensus algorithm or evening hacking the geth source code. However, with geth dev mode the blocks take a consistent few seconds to mine all the time.
We decided to look into the geth source code to see what is going on.
In flags.go we can see that geth --dev triggers a number of other options to be set.
Essentially, this is a single node network and discovery by other nodes is not allowed.
Further down in the same file, we can see where the dev mode genesis block is coming from, and by default the gas price is set to 0.
The cfg.PowTest setting hints that a dev mode proof of work algorithm is being set. We can follow this flag through to ethash.go to see why mining takes so little time and the difficulty does not increase in dev mode.
From just a read of the code it appears the DAG (cache) size is always limited to a tiny 1024/4 = 256 uint32 values, which implies that a block will be mined very quickly.
Donation DApp
There are two files to create for the DApp:
Donation.sol is the Solidity smart contract
index.html is the DApp web page
The web page source code at that link looks sparse but it will work fine in Mist and other modern browsers.
In the same directory as index.html, start a web server. Assuming you have a standard Python installation, you can just run python -m SimpleHTTPServer, which listens on port 8000 by default.
Testing the DApp
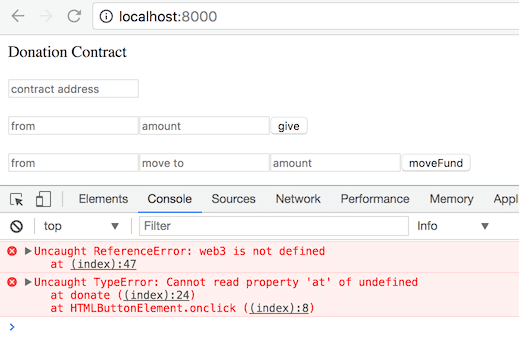
Open index.html in a web browser and clicking on the "give" button. Nothing happens because the web3.js library and connection to geth does not exist in a standard web browser.
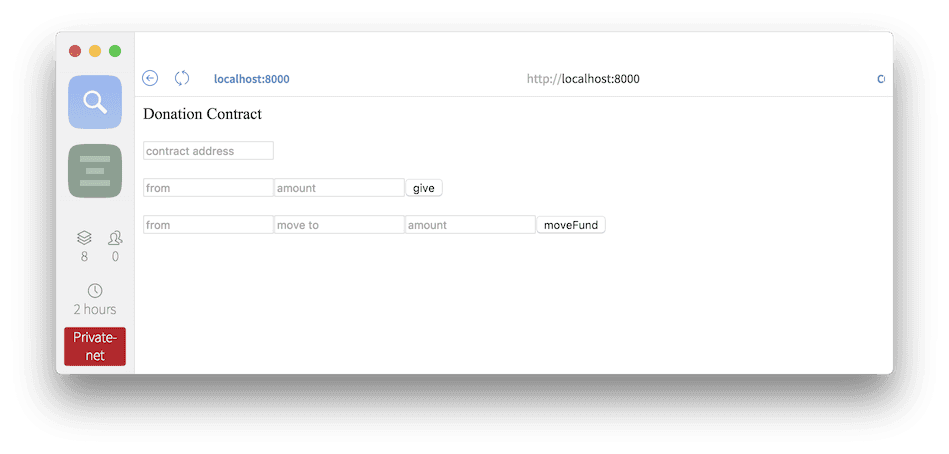
Now open index.html in the Mist browser. Click on the top navigation bar, where it likely says https://wallet.ethereum.org and replace it with the local web server hosting index.html. For example, http://localhost:8000.
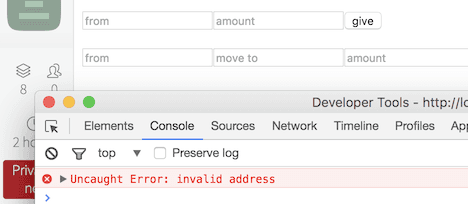
If you click on "give" now, you will still see nothing happen and an error behind the scenes, but this time it is because the required fields have not been filled in. Mist is a wrapper around the Chrome browser with added Ethereum support (web3.js, IPC connection to geth, etc.) so the standard developer tools are available. Try Develop => Toggle developer tools => localhost:8000.
Load the Smart Contract onto the Blockchain
Mist also includes the Remix Solidity IDE which can be accessed from Develop => Open Remix IDE. Per [the next step in the tutorial][mist-deploy-contract], we will use Remix to deploy the Donation.sol smart contract to the blockchain running within our geth dev node.
Open Donation.sol by clicking the folder icon in the upper right of the Remix IDE. You will notice some (intentional) warnings about unused variables and a warning about a missing pragma statement. You can ignore these for the purposes of the tutorial.
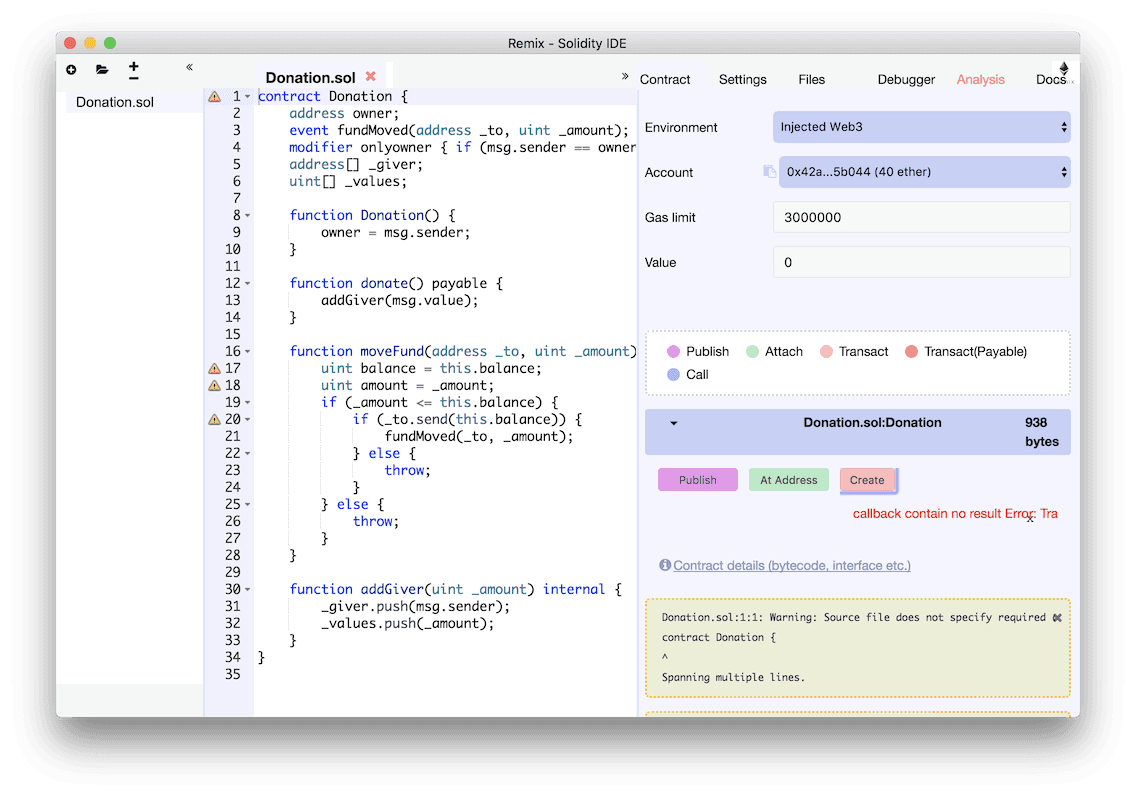
Note that the Environment is "Injected Web3" which indicates the IPC connection to the geth dev node, and the Account is the test wallet we created.
Click the pink "Create" button in the middle of the right pane to load the smart contract onto the blockchain.
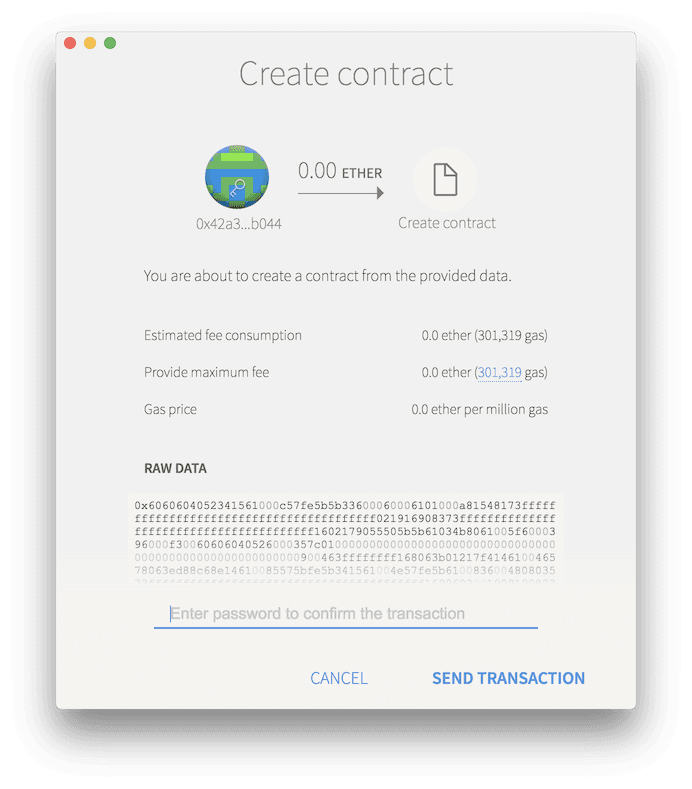
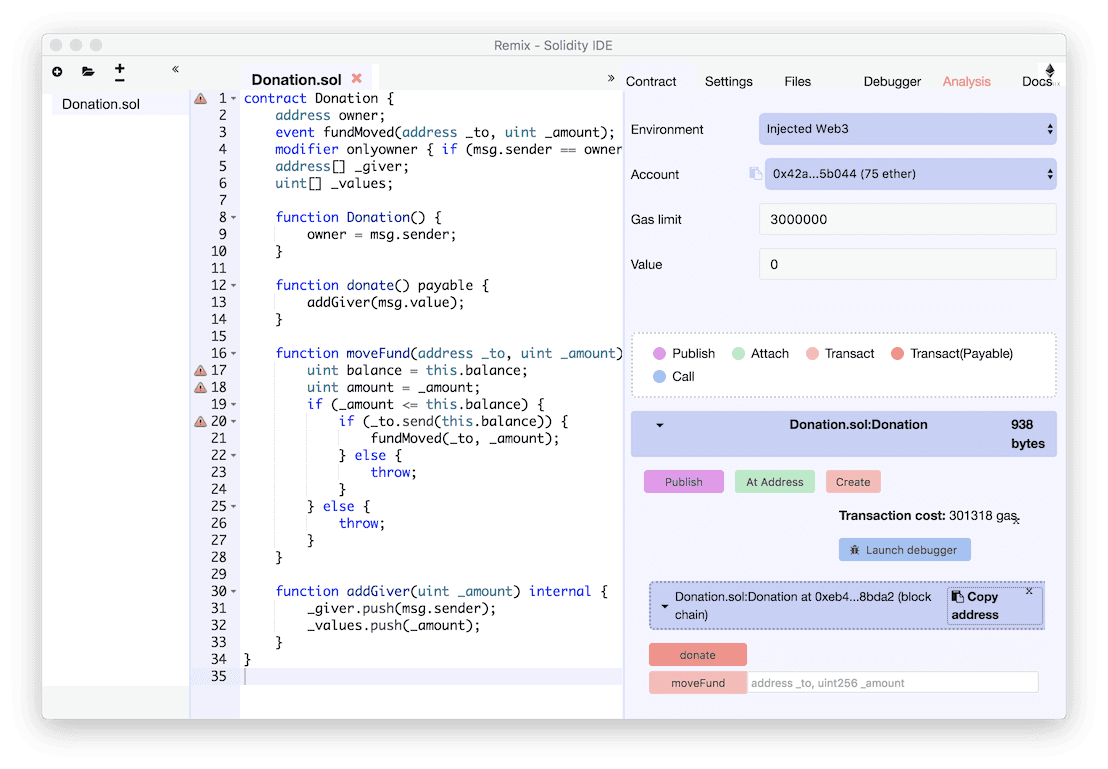
Nothing will appear to happen after clicking "Send Transaction", because Mist is waiting for the transaction to be included in the next mined block. We enabled and then disabled mining manually in geth in an earlier step, which we need to do again with miner.start() followed by miner.stop() a few seconds later once at least one block has been mined.
In Mist we see details of the deployed contract, including its address 0xeb4578083c1d0928d634298e84313104f1f8bda2. Make note of this by clicking "Copy address" and pasting it somewhere.
geth Helper Scripts
The geth console is essentially a Javascript read-eval-print loop with web3.js embedded into it. One thing we could automate to make testing easier is to trigger mining only when a transaction is pending. We avoid having to start and stop the miner, and the console and geth dev mode blockchain data folder do not fill up unnecessarily.
Here is a collection of geth scripts we have found useful.
For on-demand mining, copy the following Javascript snippet into a file, for example geth-helper-scripts.js. We include the complete source below because miner.stop() no longer takes a parameter and the script as it is on StackExchange today will not work.
Exit geth by typing exit and relaunch as follows to include the helper scripts.
Now whenever a transaction is submitted, the miner will start and stop automatically to include it in a new block.
Send a Transaction to the Smart Contract
In Mist, fill in the Donation Contract form fields "contract address" with the address of the deployed Donation.sol copied earlier. To the left of the "give" button, put the wallet address in "from" and 1000000000000000000 in "amount", which is 1 Ether in Wei.
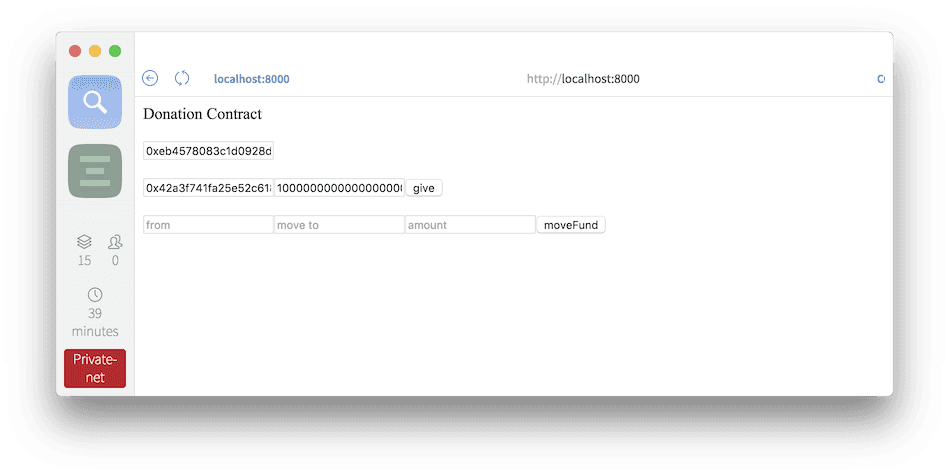
Click "give" then "Send Transaction".
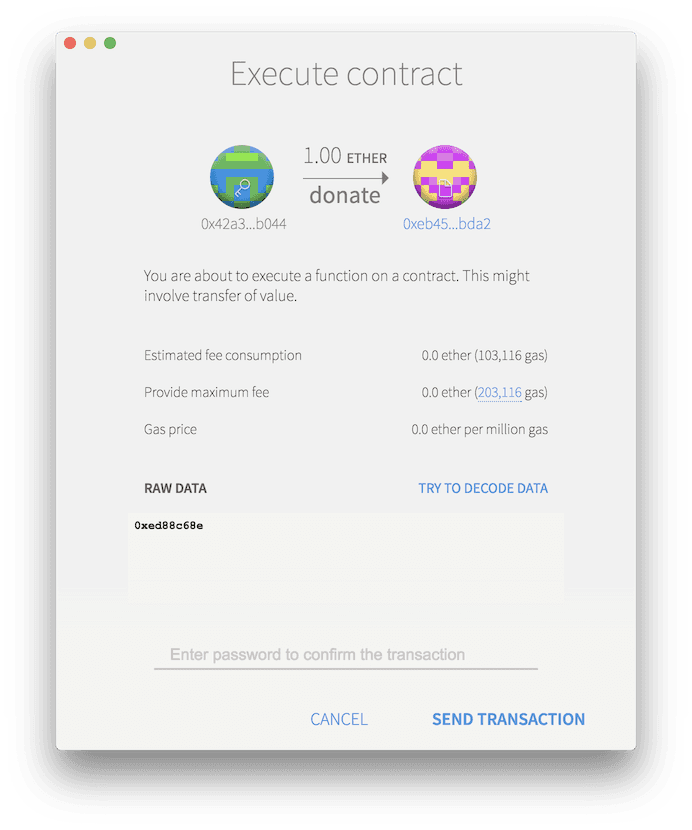
If you enabled the mining helper script in the previous section, you should see the transaction confirmed by a popup in the DApp in a few seconds. The geth console will also show the transaction has been added to a newly mined block.
Debug the Transaction
Debugging the transaction in the Remix IDE requires the transaction hash, which can now be found in the lower "log" section of the index.html in the Mist browser. Or, as the "fullhash" value in the "Submitted transaction" line in the geth console (see above). In our example it is 0xbbc31070d5c88e510b7e9ec8fafd1df9bbcdff8c55aea71f1c72c7227dd473c1.
In the Remix IDE, click the "Debugger" tab in the upper right and paste the transaction hash value into the "Transaction index or hash" field and click the play icon. You can use the buttons or the slider to step through the code.
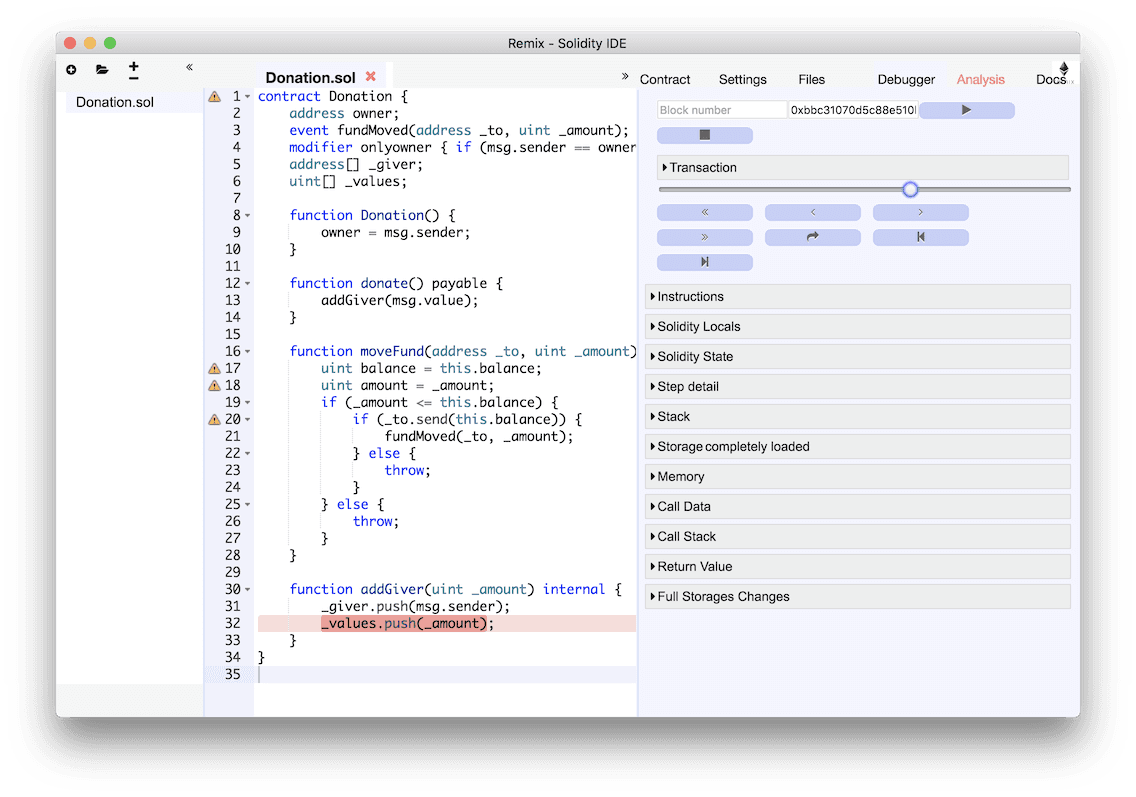
The reason you can go forwards and backwards in the debugger is that Remix has access to the entire state of the blockchain before and after the transaction. It is stepping through what happened already as opposed to realtime debugging, like an instant replay of an ice hockey goal as opposed to live action.
Conclusion
We leave things here, where the original tutorial ended as well. Geth dev mode is a great way to get up and running quickly with a test Ethereum blockchain, and the combination of geth with Mist and a simple web server is a complete toolchain for basic DApp development.